Even if Canon 5D Mark III is the 2012 model photo camera, it was widely used even for HD video production worldwide. It had a very good ISO capabilities and it’s video codec was great. It was, until there was Magic Lantern and its RAW video recording option. In just few months the Canon 5D Mark III was turbo boosted with cDNG video recording option where data is saved in ACR (Adobe Camera Raw) format with many more sharpness/color details, wide settings for white balance, exposure, highlights recovery and easier color grading. It can even be upscaled to 4K resolution and still look good. With such video camera and cDNG video capabilities no one could say that you don’t have appropriate tools to make professional works. Even in the high end industries.
-
You need a working Canon 5D Mark III camera
Buying a new or used camera, if you don’t own one yet. Prices of new ones are still holding prices for what it can do, even if you wont give so much for new old camera, there are a lot of used on the market. Just be careful that everything is working, don’t worry if it has bumps and scratches. When I bought a new Canon 5D Mark III it was only Magic Lantern with some nice help tools to improve workflow while recording video. Great tool though, you should explore it, because it can improve many things and save a lot of money.
-
Get new/used lens with good aperture
I started with old manual lenses with 28mm, 135mm and nifty fifty Canon 50mm. The prices for each buying used are about hundred bucks. They have aperture at about f/2.8 and the 50mm has f/1.8. Once you’ll earn enough, invest in best lenses. I now only use Canon 24-70mm f/2.8 L II and Canon 70-200mm f/2.8 L II. The second one has great stabilization capabilities which saves a lot of footage that was handheld. You’ll need some ND filters for all these lenses too. Shooting at shutter speed 1/50 and at wide aperture is MUST DO.
-
Buy a fast 1000x or faster CF card of 32GB+ size
The cDNG video format is massive size eating monster. Just 6 minutes of footage will take about 32GB of CF space. And believe me, when you’ll be making professional projects with many takes, you’ll have an hour (or more) of footage on your desktop PC. For starters to learn working with cDNG the 32GB CF card would be enough, later you’ll have to invest in more cards or another big card (64/128) and a fast USB3.0 laptop for transferring data on set. I choose the second one, it’s more money efficient for my work flow. Copying files from card to external hard drive is as fast as it was filled. Six minutes of footage would transfer in six minutes on hard drive. I choose Asus Transformer T100TAM with added internal storage (and replaced it with same size SSD to protect data from any physical damage). Don’t buy any cheap CF cards. The Komputerbay cards are very cheap, but die very fast. In the mean time I have made many TB of footage with Toshiba 1066x card and few less with Sandisk Extreme Pro. After two years of abusing they still work.
-
Installing Magic Lantern nightly build
When Magic Lantern started with 5DMK3 version of ML software, there were a lot of concern about bricking your camera. Today is so well made, you have to be a genius to brick a camera. Read the installation manual carefully and do as it say. It’s a two minute work. Beware of the version you need. I’m still using the 1.1.3 firmware because it’s perfected more.
-
A lot of storage on personal computer + external storage
Like said in previous point, the cDNG is a mass data monster. Unless you are just experimenting, you’ll be soon investing TB of storage. I currently have about 20TB+ esternal storage to somehow archive projects for maybe half a year… then I have to delete, because new projects eat up more and more space. Just the working hard drive is 3TB big and it can hardly handle my ongoing work. I don’t backup archive, only the final works.
-
MLV/RAW extract software
One thing I didn’t mention anywhere is that Magic Lantern packs the cDNG files in to .mlv or .raw format. You’ll need to install something like Magic Lantern RAW Video Converter 1.9.1 to extract cDNG files from your .mlv/.raw files after shooting. The .mlv options can carry audio files (choose in ML menu). For this extractor you’ll need three things – IrfanView, Adobe DNG Converter and mlrawviewer.
-
Install Davinci Resolve 12 Lite for editing
I personally like Adobe tools (Premiere and After Effects), because they have much more logic to it than Resolve. But Davinci Resolve handles cDNG’s so much better it’s a bummer that I’ll have to drop Adobe when working with such projects. Resolve Lite is free to use until you’ll need noise reduction, 4K export and dual graphic card support. You can still set footage settings like in Adobe, stabilize, track parts of video, edit and export in high definition.
The only thing to do is shoot great video that will be worth using such great tool. These tips can change slightly from case to case, because not everybody have same workflow and needs. But what I do know is, that quality is much better when working with cDNG’s instead of H264 that video camera offers.
Stay sharp!
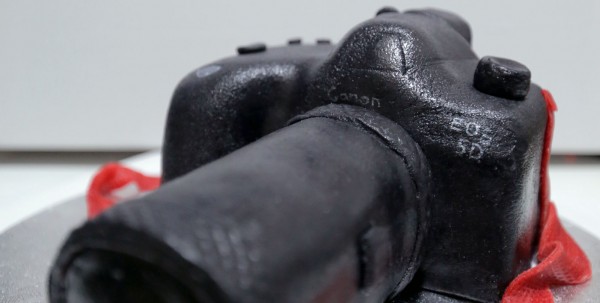
PS: Picture above was a cake of 5D Mark III I received from a friend:)


2 thoughts on “Turn your Canon 5D Mark III in to a professional video camera”